As our latest Project we’re supposed to make a tutorial about something that has to do with post-production. Post-production is far from any of my strongest sides, since I’m more fond of the pre-production parts, such as characters and story design. But I also like special effects, and realized early that I’d have to do a lot of that in After Effects, and have therefore looked at quite a few effect tutorials for After Effects. So I realized I could use that for this project. Since I’m not really that driven in it yet, though, I figured I’d go with something easy, yet (possibly, hopefully) interesting.
I've been looking at some pretty neat effects in After Effects, but most of my favourites involved Trapcode Particular, and since not everyone has access to such plug-ins (I realize that there’re free trials available, but that's no fun, is it?), I decided to go with something you can create with just the built-in plug-ins that are already in After Effects.
So what we'll be doing is having our logo, or title or whatever you want to play with, appearing with the write-on effect, then we'll be colourizing it with the scribbling effect, and then have it go away again with an eraser effect. For this tutorial, I'll be using the Noroff Logo, and when I'm done, I might use it for future projects ^^
Anyway, let’s get started :3
Programs used: After Effects (AE) (Prep in Photoshop (PS))
Difficulty: Beginner
I’ll just be assuming you either have the logo or whatever you’re going to use, ready, or at least have some knowledge within PS, since I’ll be basing my tutorial within AE. If you’d like me to make a tutorial about the prep I did in PS, please contact me (or comment) and I’ll see what I can do :3
First off, I’ve downloaded the Noroff logo
(Since PS doesn’t want to work with gif, the only large none-gif I could find was bmp, but that’s fine^^...)
It was originally 266*109 px, but I’ve resized it to 1000*427 px to fit better in the composition I’ll be creating in AE.
This is what the logo looks like in the Navigator.
Then I split up the logo so that I had the text (noroff INSTITUTTET) and the logo background (bg) in separate layers.
Then I split up the logo so that I had the text (noroff INSTITUTTET) and the logo background (bg) in separate layers.
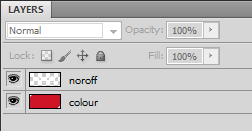
Then I saved the logo in standard PSD format, and I guess my logo’s ready for some After Effects.
The prep’ed Noroff Logo is available for those who want to just follow me.
The prep’ed Noroff Logo is available for those who want to just follow me.
| noroff_logo.psd |
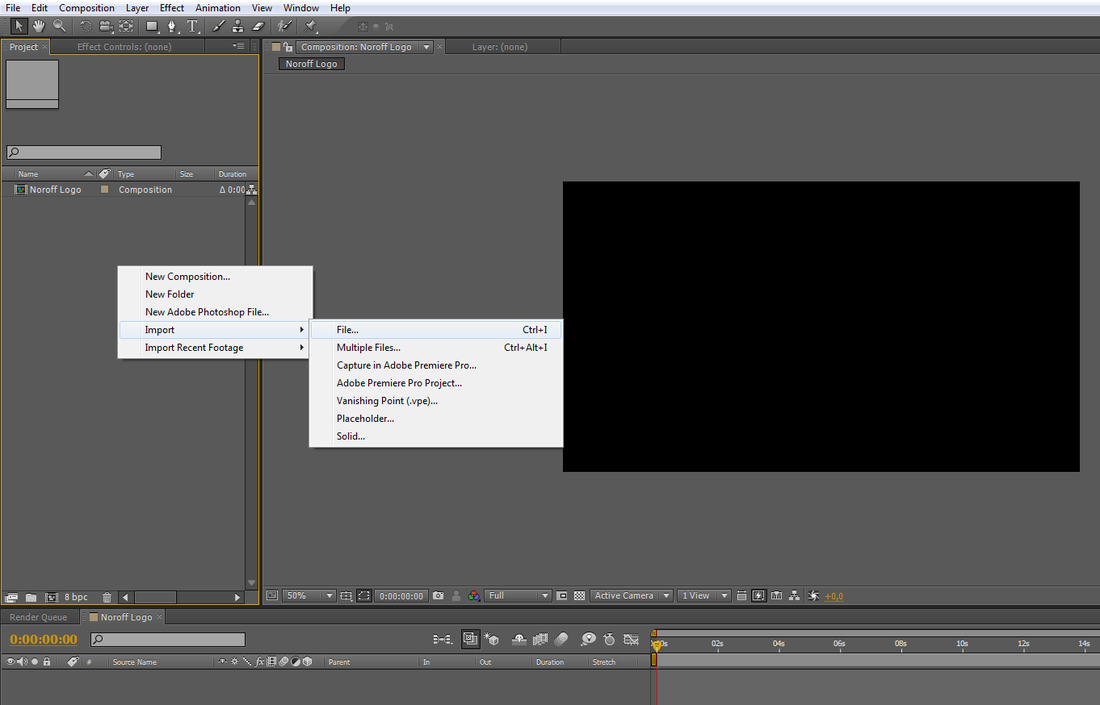
So I open After Effects and create a New Composition by right-clicking in the empty Project area and select/write the settings you can see in the picture below
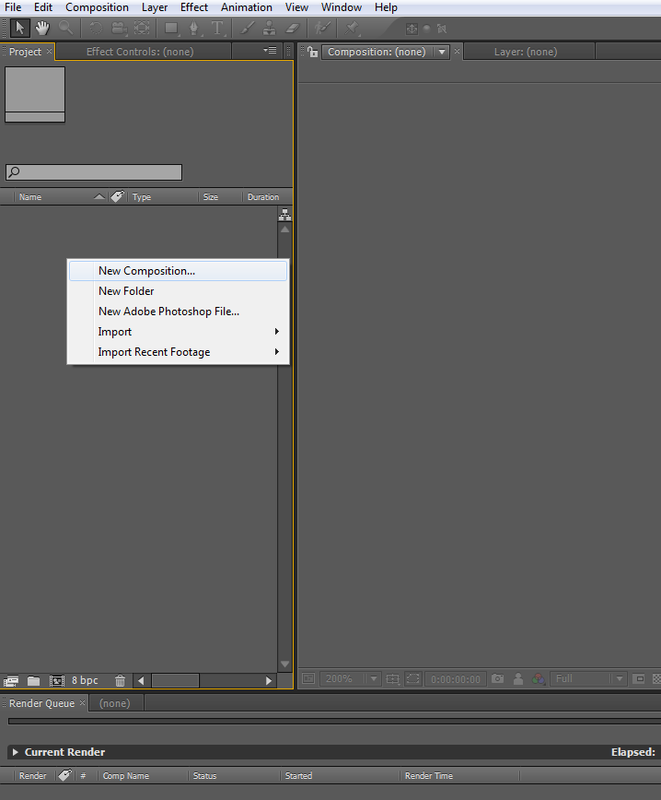
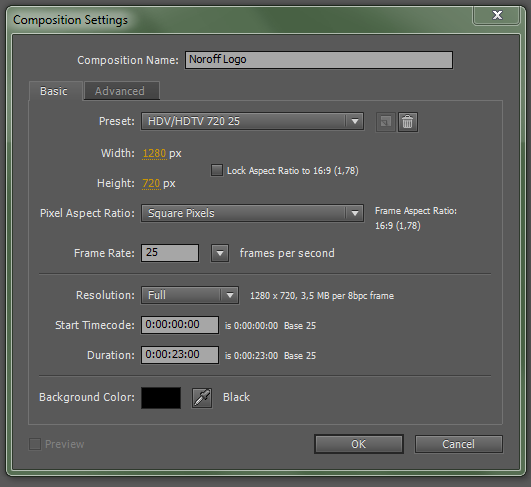
You don’t really need to think too much about the time, as long as you have enough of it. We’ll just trim it when we’re done.
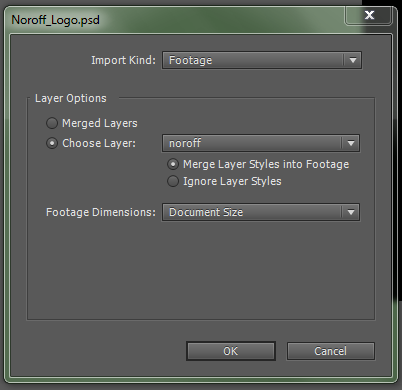
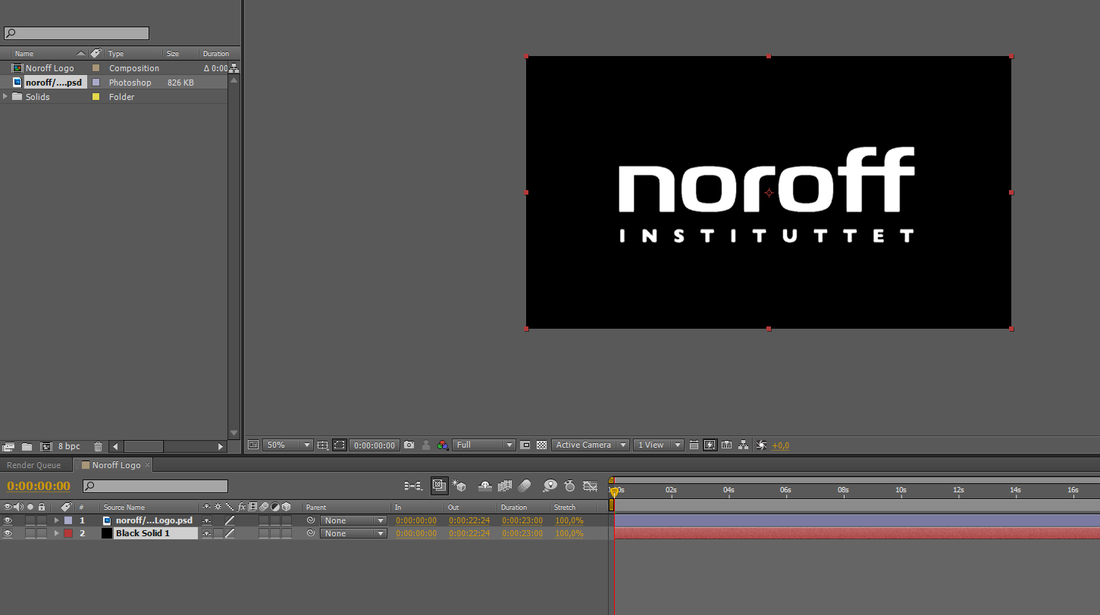
Now I have a black empty rectangle. Then I right-click in the empty area under my comp, and select Import -> File, and select the PSD file. When I hit Open, I get a selection menu, and here I select Choose Layer and select the ‘noroff’ layer (my text layer), as I will save the ‘colour’ layer for later.
Now I have a black empty rectangle. Then I right-click in the empty area under my comp, and select Import -> File, and select the PSD file. When I hit Open, I get a selection menu, and here I select Choose Layer and select the ‘noroff’ layer (my text layer), as I will save the ‘colour’ layer for later.


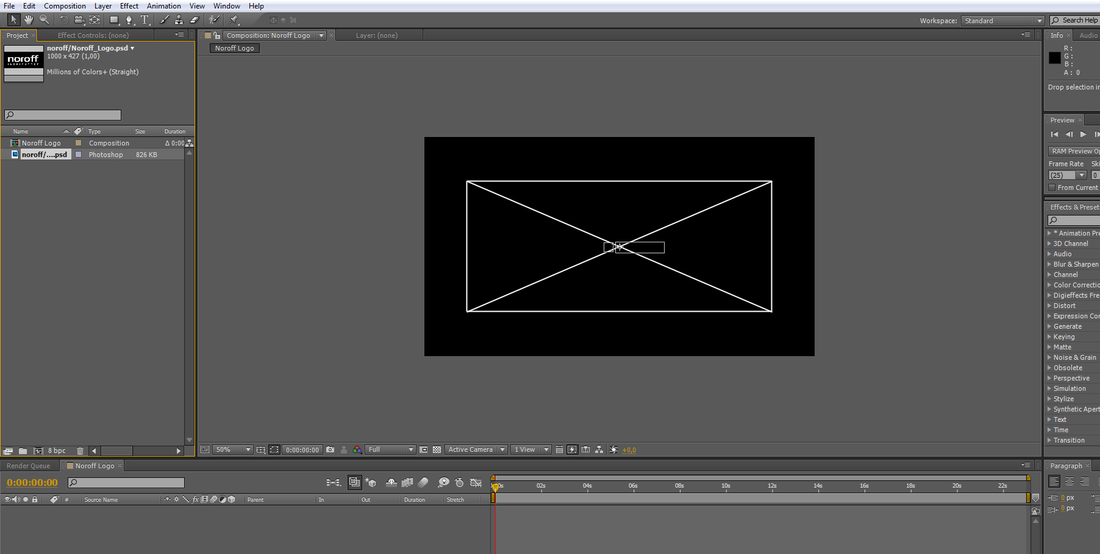
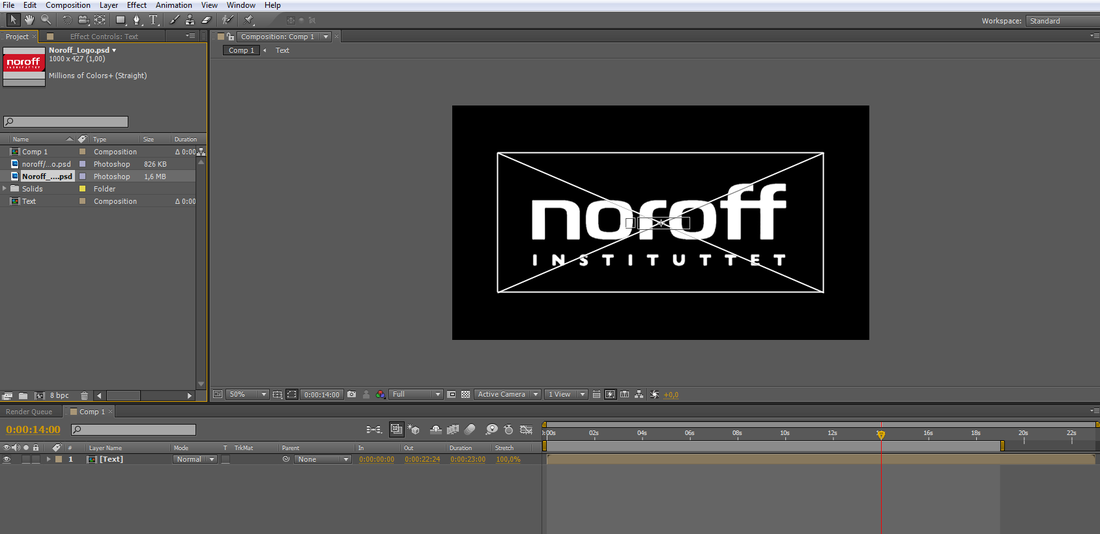
Then I’ll drag the imported text onto the comp, which is currently just a black rectangle, and let it snap to the middle.

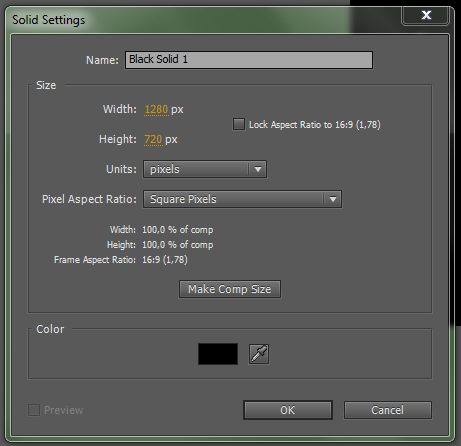
Then I’ll create a Black Solid by right-clicking in the area beneath my current layer

And then I’ll drag the Solid under my ‘noroff’ layer
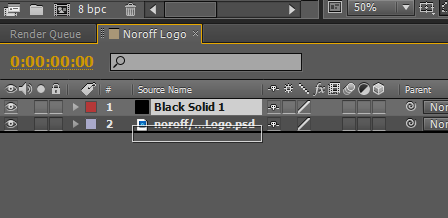
You can, of course, just create the black solid first, and then add the logo text layer. This way, you won’t need to drag the solid underneath the logo text layer. But as long as you get the same result, who cares how you do it, right?
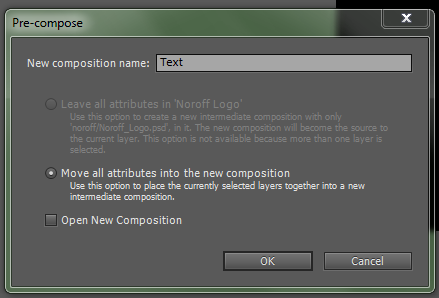
Then I’ll select both layers, and hit [Ctrl]+[Shift]+[C] to pre-compose, in order to be able to create a mask over the entire canvas in the next step. I’ll call it ‘Text’ and hit OK
Then I’ll select both layers, and hit [Ctrl]+[Shift]+[C] to pre-compose, in order to be able to create a mask over the entire canvas in the next step. I’ll call it ‘Text’ and hit OK

Now I’m going over to the Effects & Presets panel and type in ‘write’, and select the option Write-on that appears under Generate.
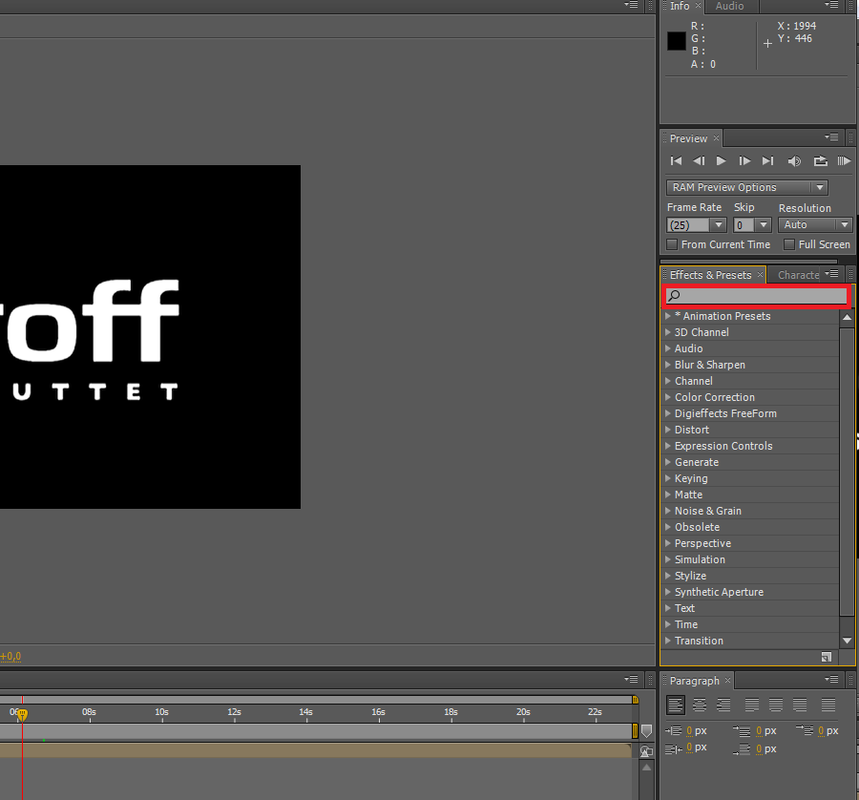

Then I’ll simply drag that onto the canvas
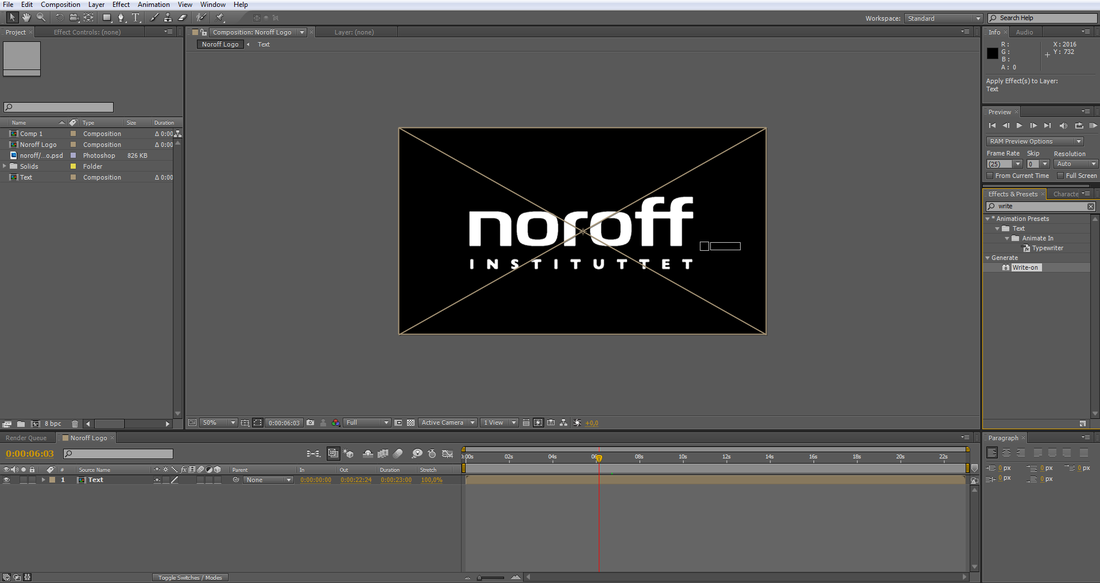
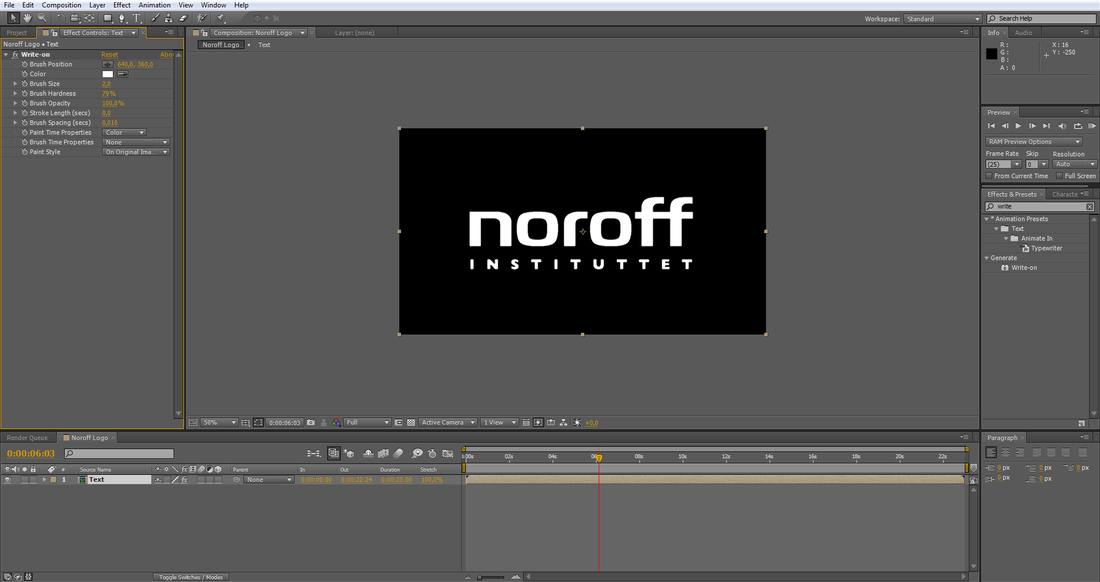
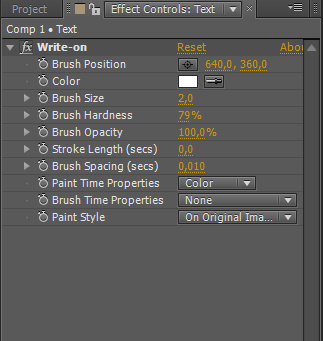
Now you’ll see the Effect Controls panel on the left, which is what we’ll be using for the next steps.
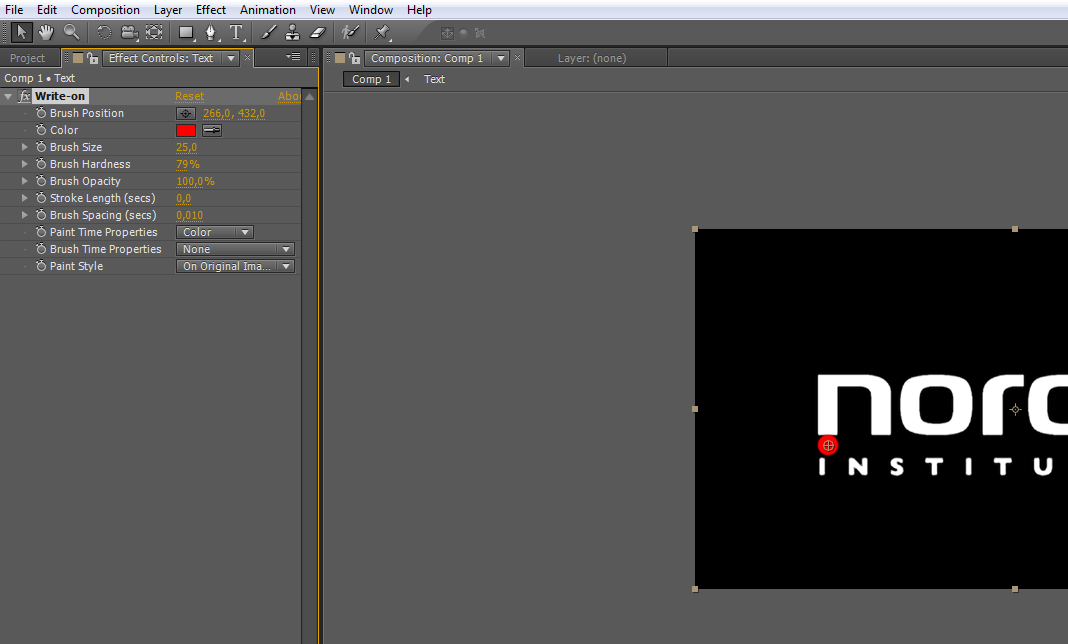
First of all, I’ll change the Brush Colour to red, so that it’s easier to see, though you can choose to keep the white, or change it to an entirely different colour, like bright green or blue, or even pink. Whatever your heart desires. Just keep in mind it should be easy for you to see. The colour won’t be visible in the result anyway :3
Now I’ll select the Brush Position and place it right underneath the ‘n’, which is where I want the writing effect to start. Next I’ll turn up the Brush Size, making it big enough so that it’ll cover the entire width of the letters, and then I’ll set the Brush Hardness up to 90.
No point having it all the way up to 100, but you can if you want to, or you could have it lower, if you’d like a softer brush, which means a softer edge to the writing effect.


Next I’ll hit the Brush Position Clock. Now it’ll start tracking the brush position as I draw onto the letters.

I’ll click in the start position, then hit [PageUp] a few times, to move forward in the timeline, and then move it a bit further along the letters. I’ll just continue like that until I’ve covered up the entire text. Off course, you can tweak it way more than I have.

And as I was done with all the letters, I learned that I should’ve saved... Oh well, when you know what to do, it’s really not that hard :3 But still... guh >_< So remember to save!
To preview the effect, change the Paint Style from ‘On Original Image’ to ‘Reveal Original Image’.
This is also what you have to do before you render.
To preview the effect, change the Paint Style from ‘On Original Image’ to ‘Reveal Original Image’.
This is also what you have to do before you render.
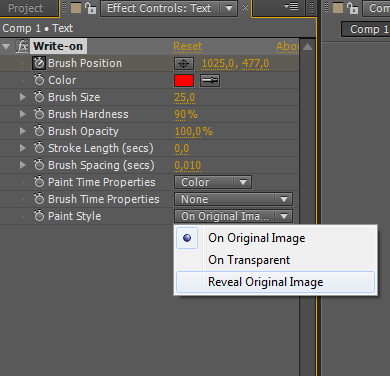
Here you can see my brushstrokes and the final result of the Write-on.
And that’s pretty much it for that step.
Next we’ll be adding the rest (bg) of the logo.
First I’ll Import the PDF file again, only this time I’ll select ‘Merged Layers’, since I’ll be needing the text to still be on top, but I’ll have the colourizing layer on top of the previous text layer.
Next we’ll be adding the rest (bg) of the logo.
First I’ll Import the PDF file again, only this time I’ll select ‘Merged Layers’, since I’ll be needing the text to still be on top, but I’ll have the colourizing layer on top of the previous text layer.

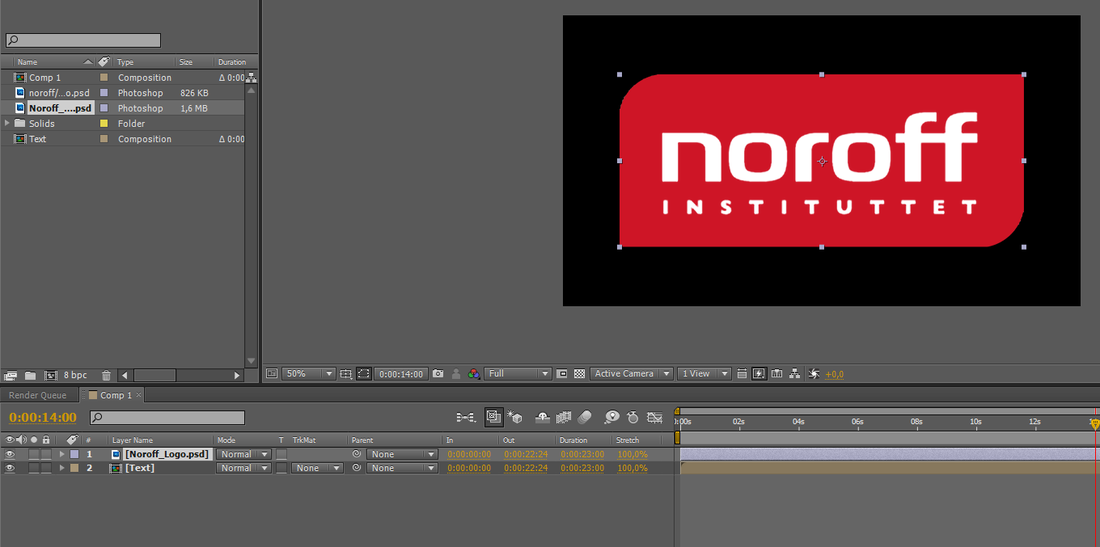
I’ll drag the layer with the complete logo into the middle, so that it’s positioned exactly on top of the text layer (don’t worry, it should snap into place once you’re close).
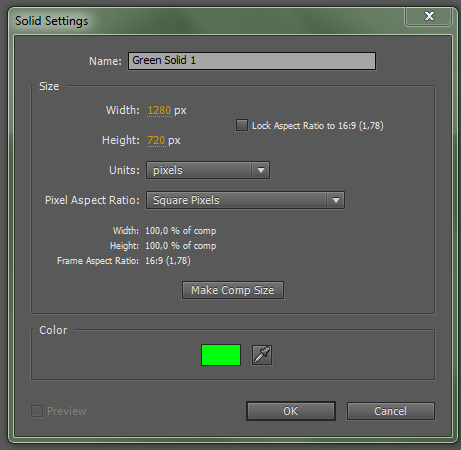
Now to add the scribble effect, I’ll first need a Solid to apply it to. Simply create a New Solid on top of the logo layer, preferably in some bright and happy colour, so that you can actually see it for the time being. Don’t you worry; this colour won’t be visible in the render either, just like the brush colour for the Write-on.
Now we’re going to need a mask, or else we won’t be able to apply the scribble effect.
You might want to turn down the opacity of the Solid, so you’re able to see where you’re supposed to put the mask, just remember to turn the opacity back up once you’re done masking, or else the scribble will look strange (and see-through).
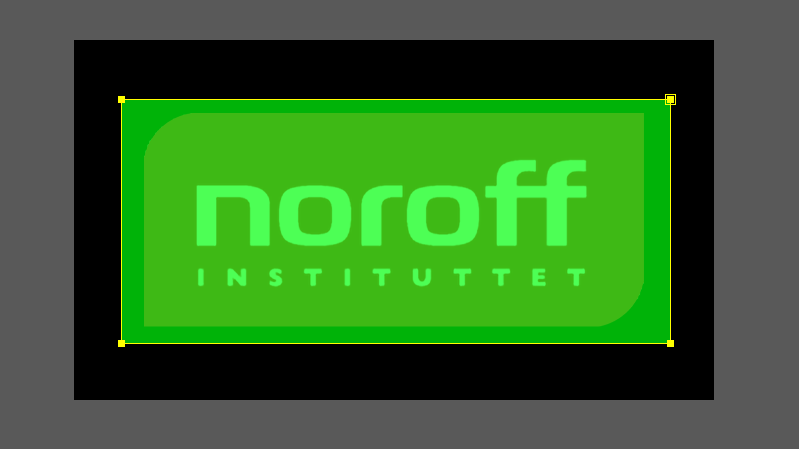
To create the mask, you must have the Solid layer selected, and then you can create a mask over the desired area.
You might want to turn down the opacity of the Solid, so you’re able to see where you’re supposed to put the mask, just remember to turn the opacity back up once you’re done masking, or else the scribble will look strange (and see-through).
To create the mask, you must have the Solid layer selected, and then you can create a mask over the desired area.
Don’t forget to turn up the opacity again
Now that I’ve masked the area I’ll be needing, it’s time to finally apply the scribble effect.
To do this, I’ll head back over to the Effects and Presets panel, and type in ‘scribble’. The Scribble will then appear under ‘Generate’, and I’ll just grab it and drag it onto the mask, and it immediately looks pretty nice. But hey, it covers way more than it’s supposed to, and it’s on top of everything instead of a part of it. Don’t worry; we’ll fix that in a second. But first we’re going to key it so it at least appears right.

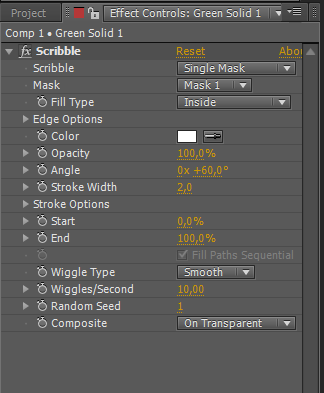
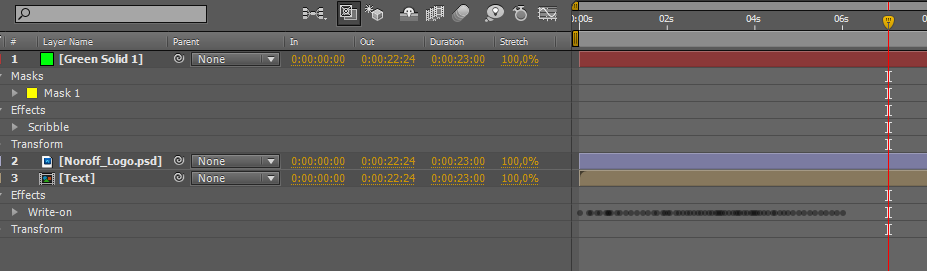
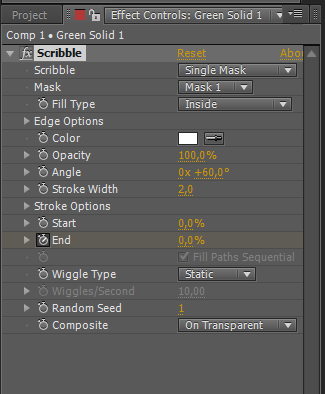
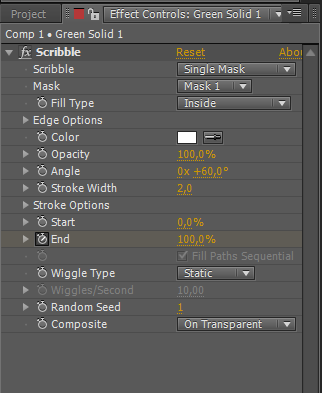
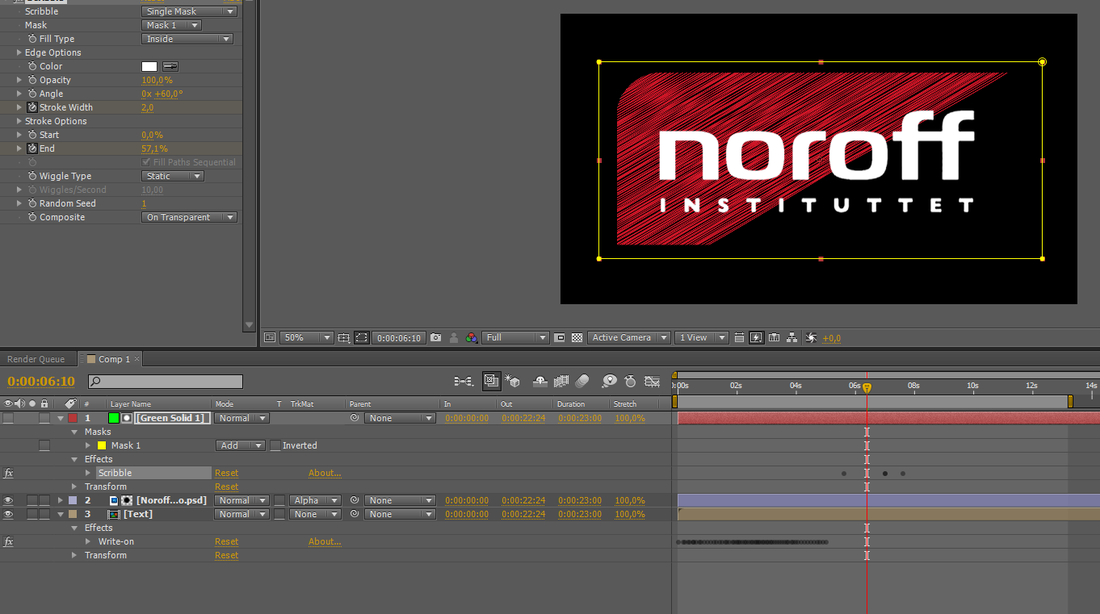
First of all, I’ll figure when I want it to start, which in this case is about half a second after the Write-on is done. I think that’s a pretty neat timing. Next I’ll hit the End Clock under the Stroke Options in the Scribble Effect Controls panel, and turn it down to 0%. Then I’ll move over to where I think it should end in the timeline, approximately a second/second and a half after the start, and turn it up to 100%.
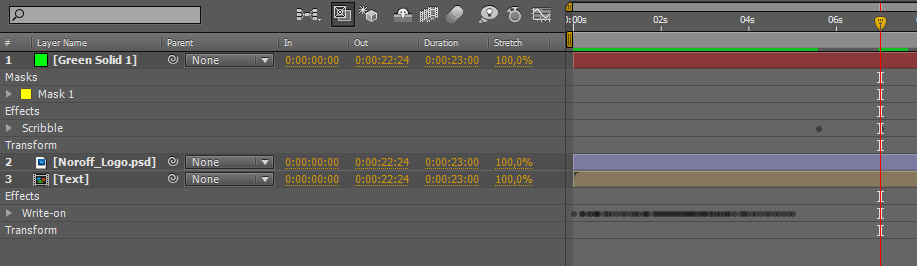
But to reveal the logo completely, I also want it to fill in, and I’ll do that by simply keying the Stroke Width. I want it start as soon as the scribbling is done, so I’m not going to touch the timeline just yet. I’ll just click the Stroke Width Clock, and then I’ll move around on the timeline. I’ll move about half a second forward on the timeline, and then turn the Stroke Width up till it fills out nice, about a 10 probably works for this one, but I’ll yank it up to a 15 just to be sure it’s completely filled out.
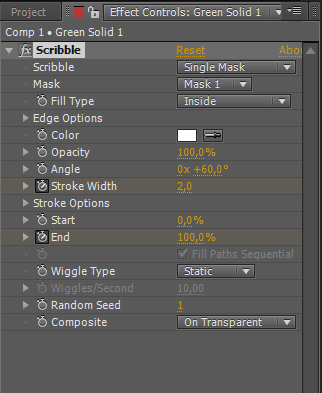


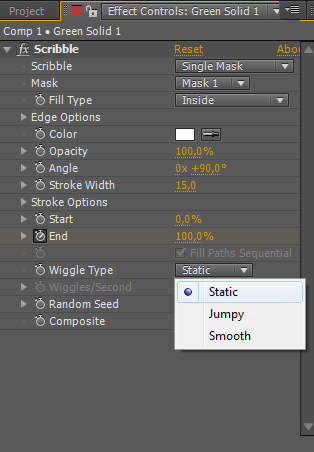
As you can probably see when you play the animation, it’s got this sort of jumpy scribbling effect, as the Wiggle Type is set to Smooth as the standard. I think this is rather distracting, so I’ve chosen to set it to Static instead. But you can choose whatever is to your liking.
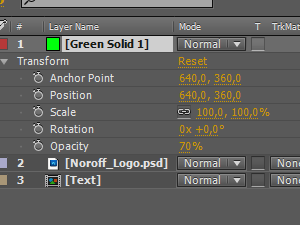
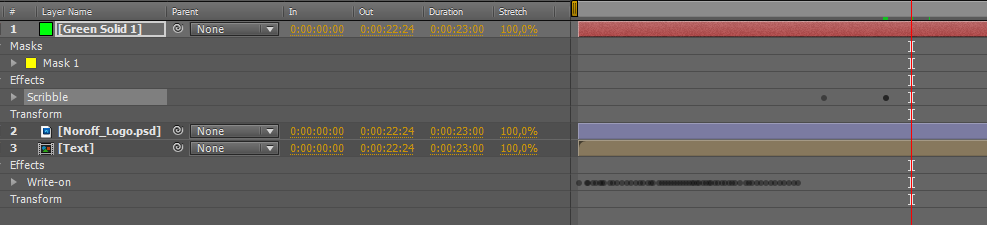
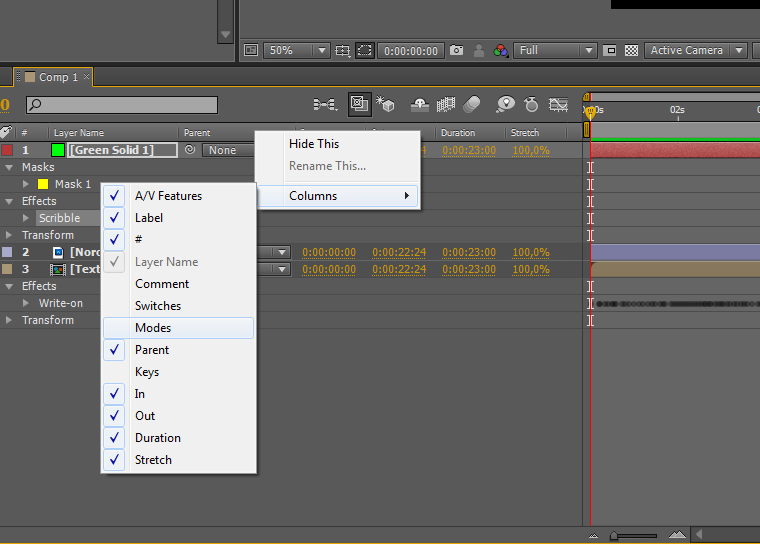
For the next step, I’ll need the Track Matte, which is available under Modes. You’ll find it by right clicking the row above the layers, and select Modes.
For the next step, I’ll need the Track Matte, which is available under Modes. You’ll find it by right clicking the row above the layers, and select Modes.
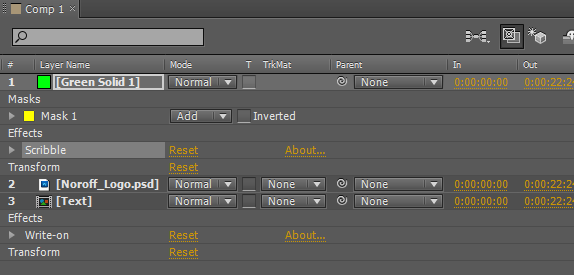
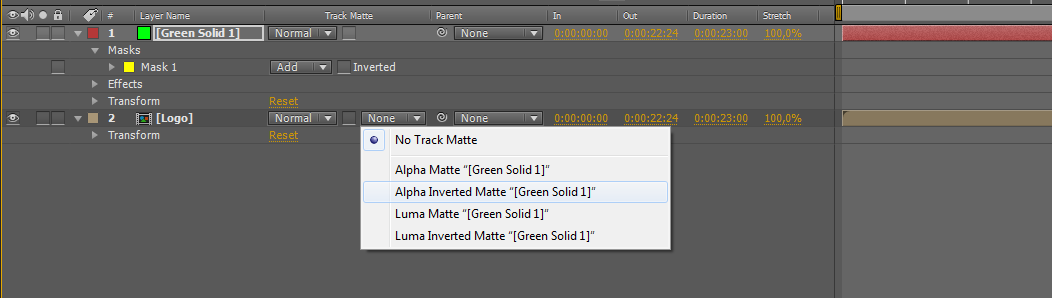
With the Track Matte enabled, I can move over to the TrkMat Drop Sheet on the Logo (bg)layer,
and select Alpha Matte “[Green Solid 1]”, which is the layer with the Scribble effect.
and select Alpha Matte “[Green Solid 1]”, which is the layer with the Scribble effect.

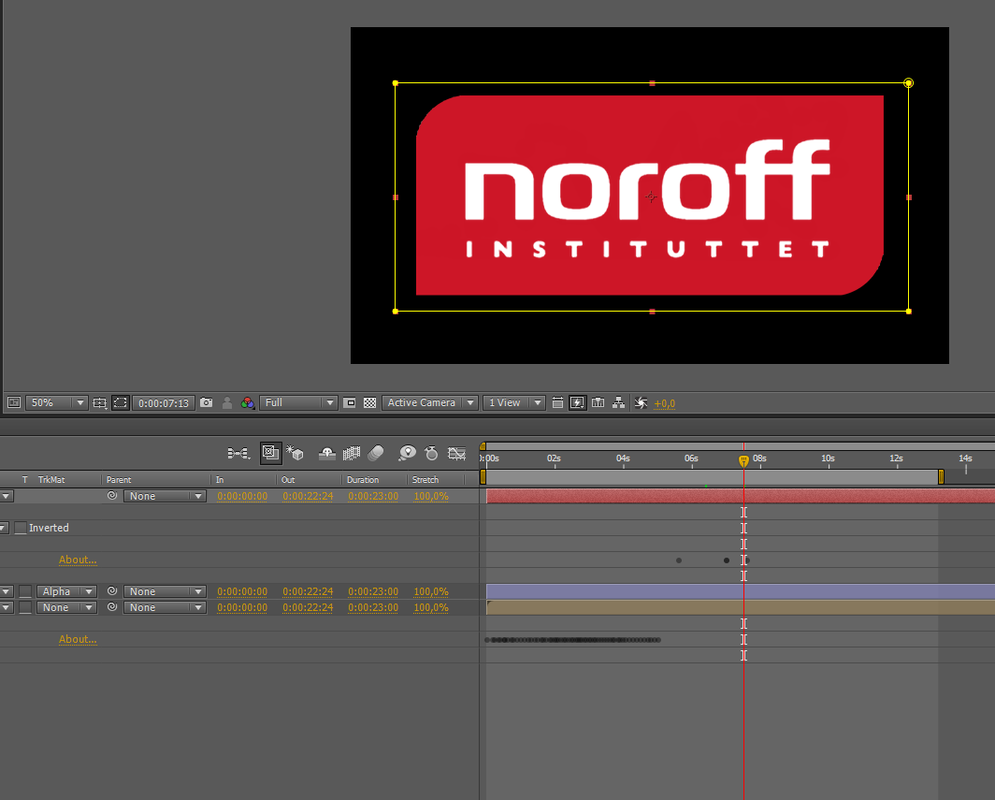
Now with the Alpha Matte selected, you can see a neat scribble effect on the logo layer as I move around on the timeline.
Keep in mind that you can easily change the timing of all the keyed aspects simply by moving the keys around.
This is the result of what my logo looks like with the Write-on and the Scribble effects
This is the result of what my logo looks like with the Write-on and the Scribble effects
When you’re happy with your result, you’re free to choose whether you want it to stay put, e.g. if you want it on top of the credits, and then, when it’s fully appeared, you want it to start scrolling upwards, with the credits following.
Or if you want it to disappear again, you can follow me as I explain the Eraser effect.
It’s really just the Scribble effect with Inversed Alpha Matte and a few adjustments.
On we go then.
First of all, when you’re completely happy with the appearance of the logo
(and I mean COMPLETELY happy with it), you have to pre-comp it again.
If you don’t, you’ll probably have some trouble with the new scribble effect.
I’ll call my new pre-comp ‘Logo’ (so creative!).
Remember you’ll have to select all the layers before you hit [Ctrl]+[Shift]+[C] to pre-comp.
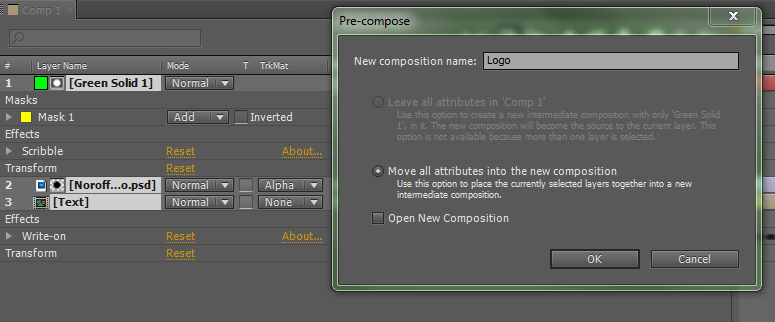
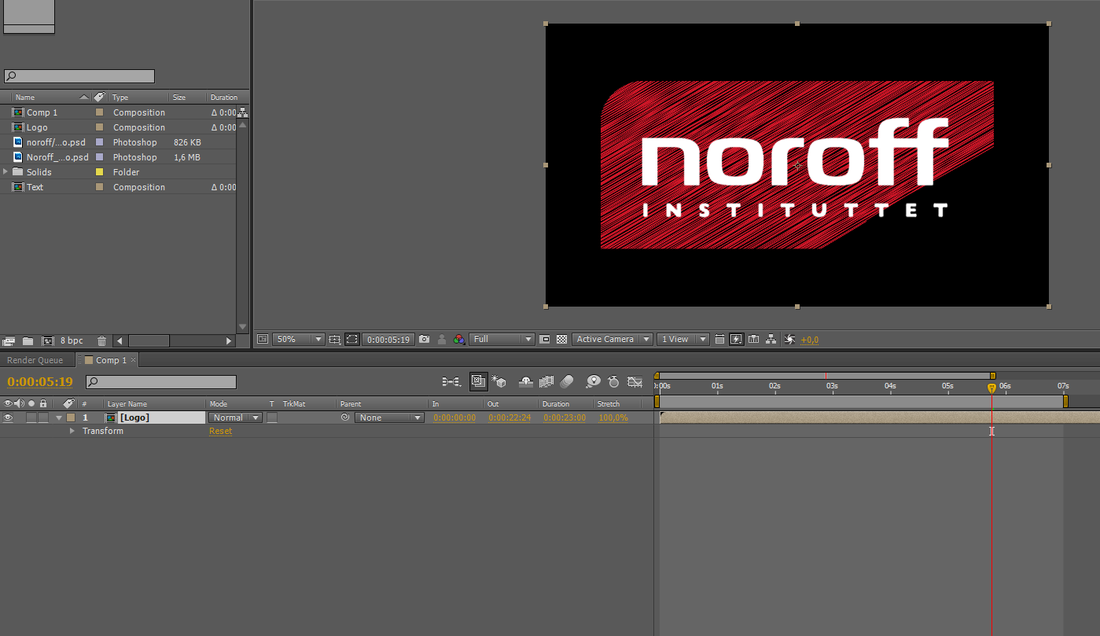
As you can see, the animation and effects are still there, but the keys and effect options/panels are gone. Which is why you should be satisfied with the whole thing before you pre-comp, or else you’d have to go back to change things, as you are no longer able to just move the keys around.
Now I have to create a New Solid for the new Scribble effect. Or I can just select my previous ‘Green Solid’ from the ‘Solids’ folder in the Project panel.
Now I have to create a New Solid for the new Scribble effect. Or I can just select my previous ‘Green Solid’ from the ‘Solids’ folder in the Project panel.

Then it’s really just the same thing over again. Turn down the opacity to see the logo underneath, create a mask (remember to have the Solid layer selected before creating the mask), turn the opacity back up again, and apply the Scribble effect to the mask.
Now I can start with the differences as opposed to the previous Scribble I created. First of all, I’ll have the angle to 90°, then I’ll have the Stroke Width to 15 to give it thicker strokes, as most erasers are thicker than pencils, and I want the logo to disappear completely.
Now I can start with the differences as opposed to the previous Scribble I created. First of all, I’ll have the angle to 90°, then I’ll have the Stroke Width to 15 to give it thicker strokes, as most erasers are thicker than pencils, and I want the logo to disappear completely.
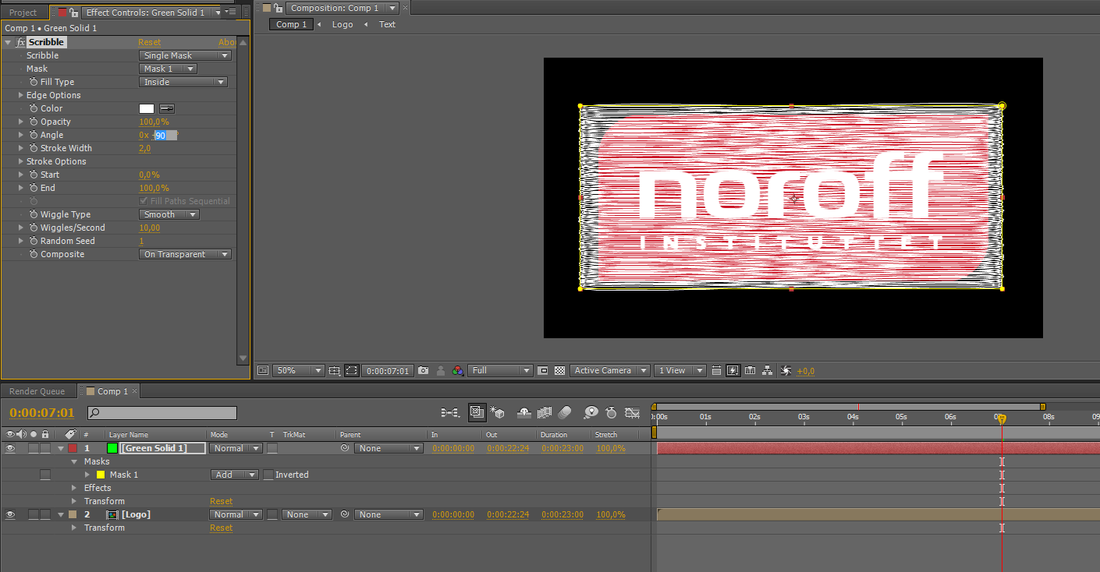

Now for the effect animations, it’s pretty much the same as for the previous Scribble. Hit the End Clock, turn down to zero, move forward on the timeline, and yank it up to 100%. As for the Stroke Width, I'll just keep it at 15.
I’ve chosen Static (again) for the Wiggle Type, as it, in my opinion, gives it a better Eraser effect.
I’ve chosen Static (again) for the Wiggle Type, as it, in my opinion, gives it a better Eraser effect.
Now for the effect to apply, and as an eraser, not as a pencil scribble, I have to select the Track Matte. But this time, as I mentioned as I introduced it, instead of selecting ‘Alpha Matte’, I’ll select the ‘Invert Alpha Matte”[Green Solid 1]”’.
This’ll give me a neat erasing effect.
This’ll give me a neat erasing effect.
Now all I have to do is move around the keys and make desired changes, and it’s done. Now I’ll set the work area to the desired time, right-click on the Work Area Slider and select ‘Trim Comp to Work Area’ and it’s ready for rendering.
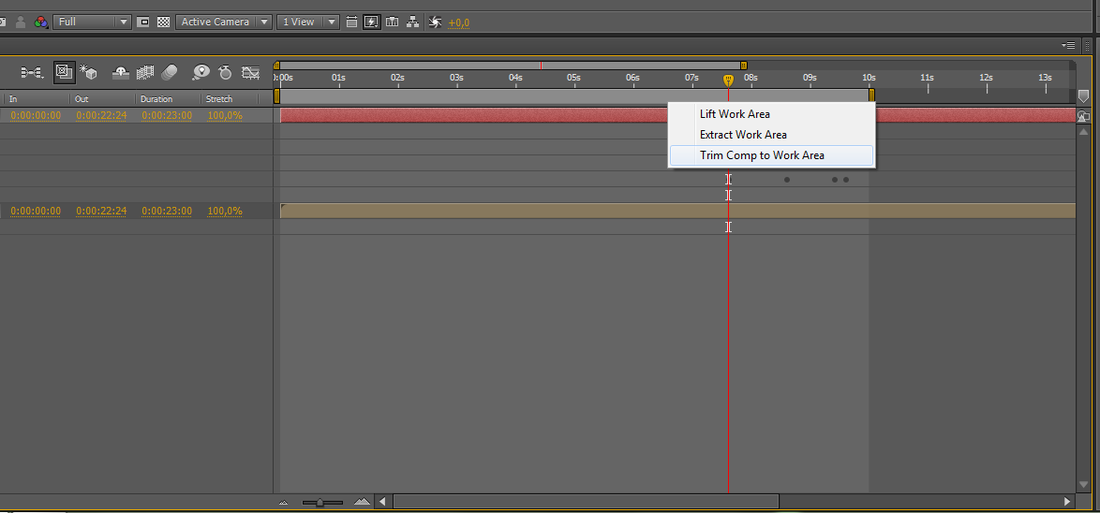
As for the rendering, you just select Composition->Add to Render Que (or just [Ctrl]+[Shidt]+[/]). Then go to the Render Que. Adjust the settings you’d like, and then hit Render.

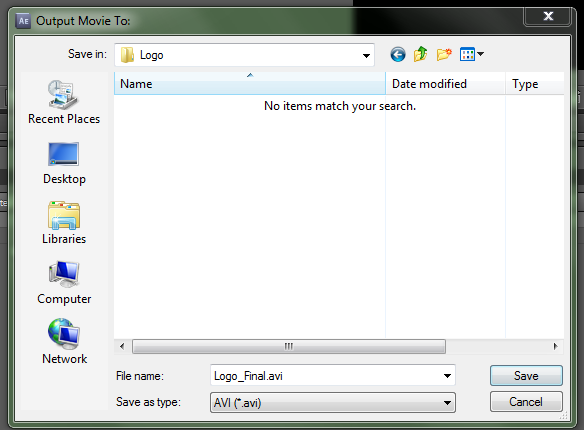
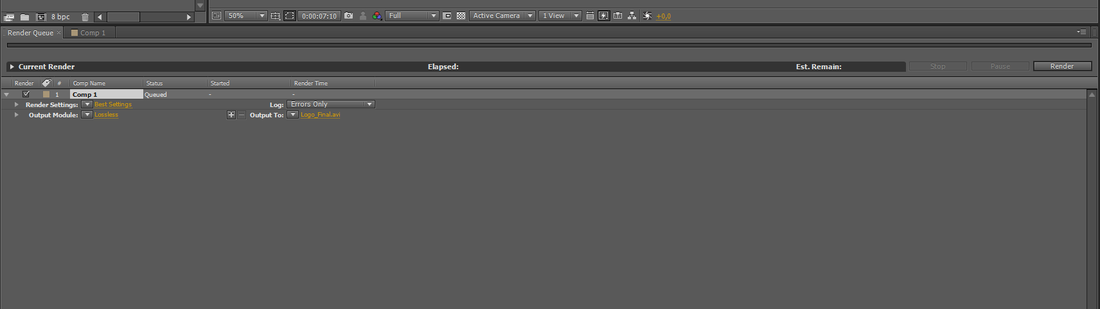
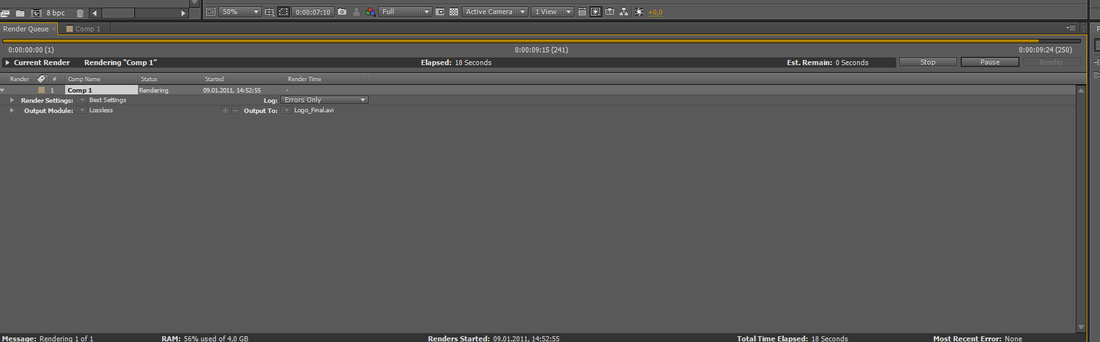
Now you’ll find the finished render in the folder you selected for the output.
Hope you found at least parts of this tutorial interesting and informative, and that you might be able to use it.
If there’s anything you’re wondering about, or anything you think has been unclear, please let me know, and I’ll see what I can do. :3
~Enjoy~
If there’s anything you’re wondering about, or anything you think has been unclear, please let me know, and I’ll see what I can do. :3
~Enjoy~
 RSS Feed